
Ok folks, here I want to give you an outline of how best to make concrete when the time comes to install your Swing Set Anchors. I don’t work in the construction industry myself and although I kind of know the basics of how to do it, I would have to say that I didn’t know how to do it 100%. I’m also sure that there are lots of parents out there just like me who are in the same boat…
So I did my research and got my own Swing set Anchors embedded in a super rock solid concrete foundation that has not moved a mm since the day I installed it and it gives me such a GREAT SENSE OF SATISFACTION knowing that my kids are 100% safe and secure as they play each day…
I also know there are lots of people out there who have a basic but not a full understanding on how to tackle this project in making good solid concrete – so I want to to give you a detailed outline on how best to tackle this project so that you can be just like me – to have security knowing that your Swing Set Anchors are rock solid!!!
So let’s get started… what materials do you need? Well firstly don’t forget to dig the holes! As a guide - dig the holes 20 inches deep and 16 inches wide there or there abouts…
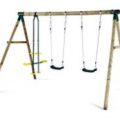
View also: Popular Swing sets at Wayfair Here
How many Concrete holes do I need to dig and how many Swing Set anchors need to be installed?
You have 2 options here:
- You can put all 4 legs with the Swing set Anchors in Concrete bases, or
- You can do Diagonal legs in Concrete and use Spiral Anchors for the other 2 diagonal legs. (twistable down into the ground)
Personally myself, I prefer to do all 4 Swing set Anchors in a concrete base – I don’t have time to go to the gym these days so this extra workout did just fine as a substitute!!!
So back to business, what materials do you need? Head to the local hardware store and gather up one of the following 3 options:
- Cement / Builders Sand / Gravel - individually bagged. The amount of KG of each bought should be the equivalent Ratio - 1 part Cement , 2 parts Sand, 3 parts Gravel .
- Or your local provider may have a Sand Gravel mix in stock. In that case, the amount of KG of each bought should be the equivalent ratio - 1 part Cement, 5 parts Sand Gravel mix
- Or your local provider may have a Ready mix concrete bag in stock. In that case you only have to worry about one stock item to buy.
As a guide - depending on the size of the area you intend to dig, you could need anywhere between 70kg to 100kg stock to fill each hole.
In addition to one of the 3 options above, you will need:
- Large bucket for holding water
- Small bucket (or measuring can) so that you can measure and keep count of the volume of cement / sand / gravel being used when mixing.
- Work gloves and goggles especially if it’s a windy day as cement is caustic and you need to avoid it getting onto your skin and eyes.
- Measuring tape to double check the dimensions of the hole.
Ok, I have it all gathered up, what next?
Now we need to starting mixing the correct ratio of each of these items with water.
- If you have bought the cement, sand and gravel separately - mix the material as 1 part cement, 2 parts sand and 3 parts gravel in the wheelbarrow or in an extra-large bucket and give it a good thorough dry mix.
- Now start to add water – the amount of water is hugely important because if the texture is too runny or watery - it will be too weak and if it’s too hard, it won’t be mixed sufficiently so PLEASE TAKE YOUR TIME AT THIS PART until you have a good texture – add it slowly and use your measuring can to control it.
- Continue mixing for approx. 5 minutes until you have a really good mix. A shovel / hoe or a smaller hand tool such as a trowel can be used or both if it gets you the correct result.
- If you are unsure, about the consistency, you can carry out a slump test by filling a cone with your concrete, emptying it on a piece of plywood and measure how far it slumps down, - ideally it should slump down by no more than 8 to 10cm.
- Now pour the concrete into the holes up to about 0.5 to 1 inch to the top and level off (called floating) with a piece of timber to give you a nice clean finish.
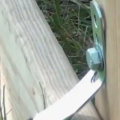
- Next set the Swing Set anchors into them ensuring they are completely covered.
Don’t forget – GET RID OF THOSE AIR BUBBLES...
- One last thing, to ensure the Concrete is rock solid for the Swing set Anchors - tap the edges of the concrete or dip a narrow stake / stick approx. 1 to 2 inches wide up and down (rodding) for 5 minutes to get rid of the air bubbles. The more air bubbles it has the weaker the concrete will be so make sure to put some effort in here – another good reason for a workout!!!
- Now that the job is done - leave the concrete and Swing set Anchors sit undisturbed for 24 hours minimum. If you have wet weather, give it a further 24 hours.
Something you may come across…
If your local provider has the Ready mix concrete bags – you may find that they have 2 types:
- Rapid set / Quick set Concrete
- Regular Ready mixed concrete

Both will do a great job but be aware that the Rapid set concrete will only give you 15 minutes to work on installing the Swing set Anchors before it starts to harden, whereas the Regular Ready mix concrete will give you a longer period to work with.
So if you need additional time tackling putting these Swing Set Anchors in your concrete, then choose the regular option.
View also: Popular Swing sets at Amazon Here
Now for some money saving tips…
1st MONEY SAVING TIP:
If you don’t have a wheel barrow for mixing and don’t want to buy one, then try to source large bucket containers that are approximately 16 inches in diameter and 20 inches deep, that way these can be placed into the holes that you have dug and can also be used for mixing.
2nd MONEY SAVING TIP
If you have cement left over and intend to use it again later down the road, make sure it is sealed completely in another plastic bag or a refuse sack - this is to prevent any moisture from the air getting at it which will reduce its quality and becoming lumpy. It’s a simple little trick as it can you save you money and a drive to the hardware store to buy another fresh bag of cement when the next small project pops up…
3rd MONEY SAVING TIP
Also, I don’t want you to have to buy a new shovel so make sure to water hose it down and all the other equipment such as the wheelbarrow as the concrete will be difficult to remove once it hardens and will damage them. Any left-over sand can be added to your kids Sandpit also.Depending on where you are visiting from, the Anchors types and prices can vary a lot - so if you would like to take a closer look, please feel free to browse the menus on the bottom of this page
Well - that more or less covers, I hope you have found this information useful and if you have any particular queries, please do not hesitate to leave a comment below.
Remember - LOCK THOSE SWING SET ANCHORS TIGHT!!!

Pingback: Sandra
Everything to know about swingsets…I love your site and plan to refer back to it when I build my first swing set. My kids too young yet, but I found your site very informative with great content. Its a clean look and well laid out with easy navigation. You might consider adding an email collection pop up windown somewhere to gain more steady viewers. All in all great fund site and thanks for the helpful content and tips you provide.
Your welcome MattyB and thanks for your own tip. Delighted that you found good content throughout the website with loads of information.
Many thanks for visiting and don’t forget to come back again when the kids are older!!!
Regards
Paul